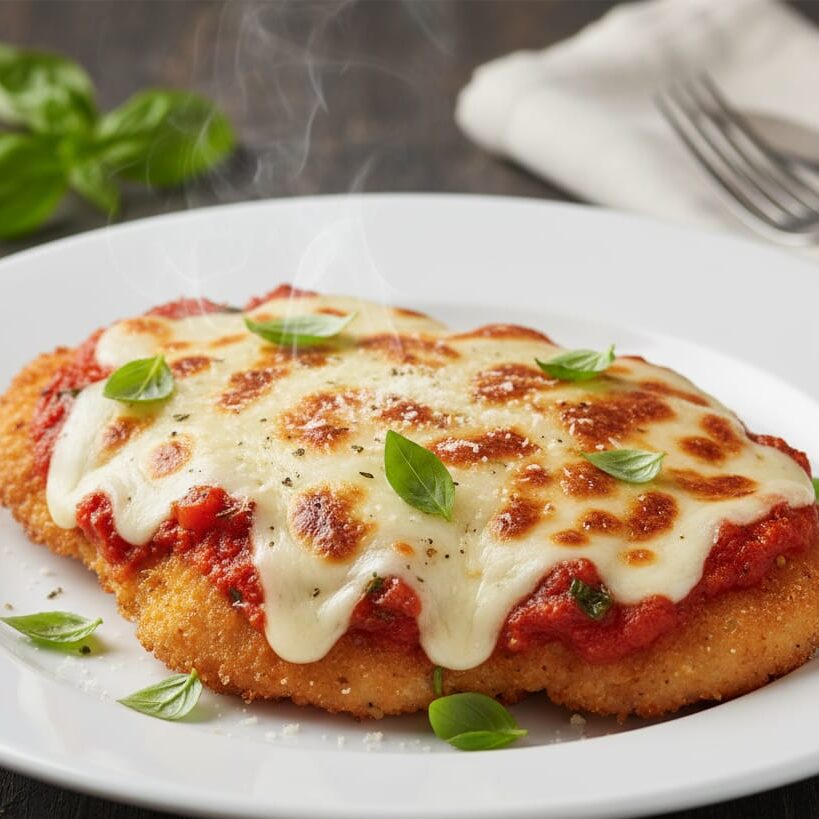
This baked chicken parmesan is a simple keto-friendly dinner made with almond flour, juicy chicken, and melted cheese. Crispy, easy, and perfect for everyday cooking.
Craving something cheesy, crispy, and comforting… but still want to keep it simple?
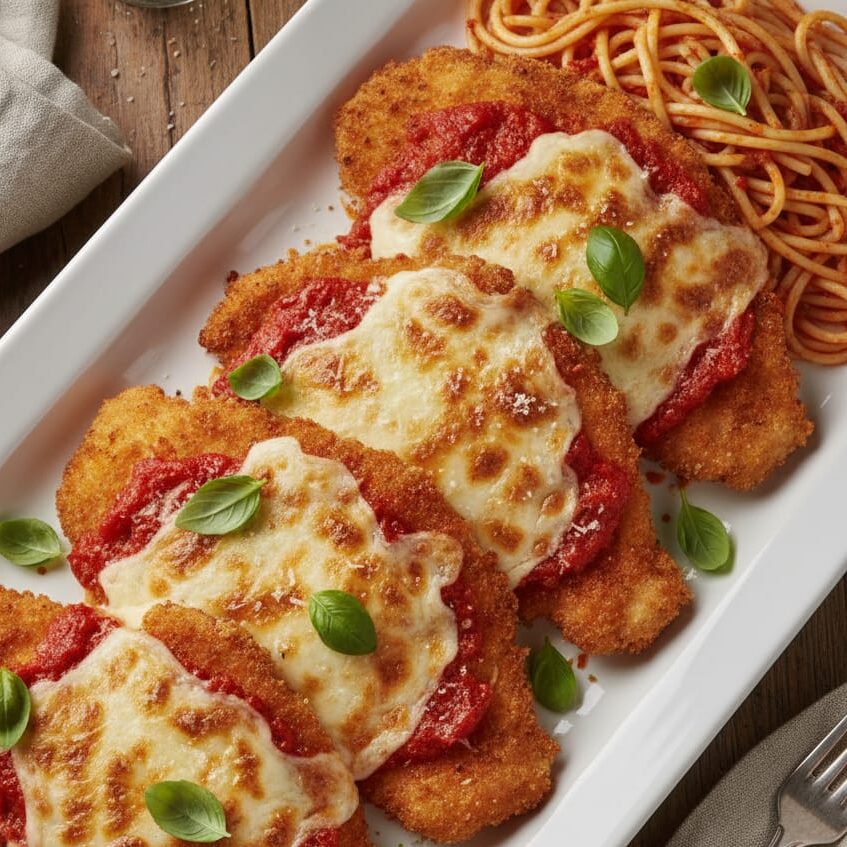
This Baked Chicken Parmesan (Keto-Friendly) is one of those recipes that feels special without needing complicated steps.
I’ll be honest—this is one of those recipes I come back to again and again. It’s easy, uses basic ingredients, and always turns out satisfying.
What I like most is that it doesn’t feel like a “replacement” recipe. It actually stands on its own. The chicken comes out crispy on the outside, juicy inside, and once you add the sauce and cheese… it just works.
Also, I chose baking instead of frying here. It’s less messy, quicker to manage, and still gives a really nice texture—so for me, baking is always the better option.
Chicken Parmesan Recipe Overview
- Prep Time: 15 minutes
- Cook Time: 25 minutes
- Total Time: 40 minutes
- Servings: 4
- Course: Dinner
Ingredients I Used in this Chicken Parmesan Recipe
- 4 chicken breasts (boneless & skinless)
- 1 cup almond flour
- 1 cup grated Parmesan cheese (divided)
- 2 eggs (beaten)
- 1 tsp garlic powder
- 1 tsp onion powder
- 1 tsp Italian seasoning
- ½ tsp paprika
- Salt & black pepper (to taste)
- 1 cup marinara sauce (I used sugar-free because it keeps the flavor balanced, not too sweet)
- 1½ cups mozzarella cheese
- 2 tbsp olive oil
👉 My choice tip:
I used almond flour instead of breadcrumbs because it gives a nice coating without making the chicken heavy. Also, I prefer olive oil over butter here—it keeps things lighter and still flavorful.
Step-by-Step Method of Chicken Parmesan Recipe
1. Prep the Chicken
Preheat your oven to 200°C (400°F).
Pound the chicken to even thickness so it cooks evenly. Pat it dry.
2. Prepare Coating
In one bowl, beat the eggs.
In another bowl, mix almond flour, half of the Parmesan cheese, and all the spices.
3. Coat the Chicken
Dip each piece of chicken in the egg first, then coat it in the almond flour mixture.
Press lightly so it sticks well.
4. Bake the Chicken
Place the chicken on a baking tray. Brush lightly with olive oil.
Bake for 20–22 minutes, flipping halfway through.
5. Add Sauce & Cheese
Take the chicken out, add marinara sauce on top, then mozzarella and remaining Parmesan.
6. Final Bake
Bake again for 5–7 minutes until the cheese melts.
If you like slightly golden cheese, broil for 1–2 minutes.
7. Serve
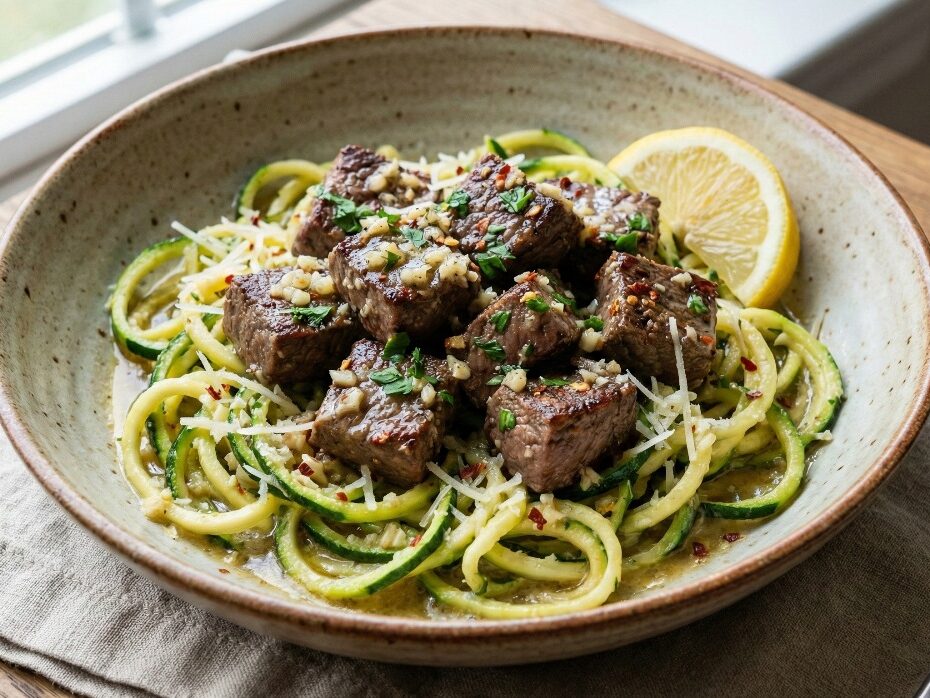
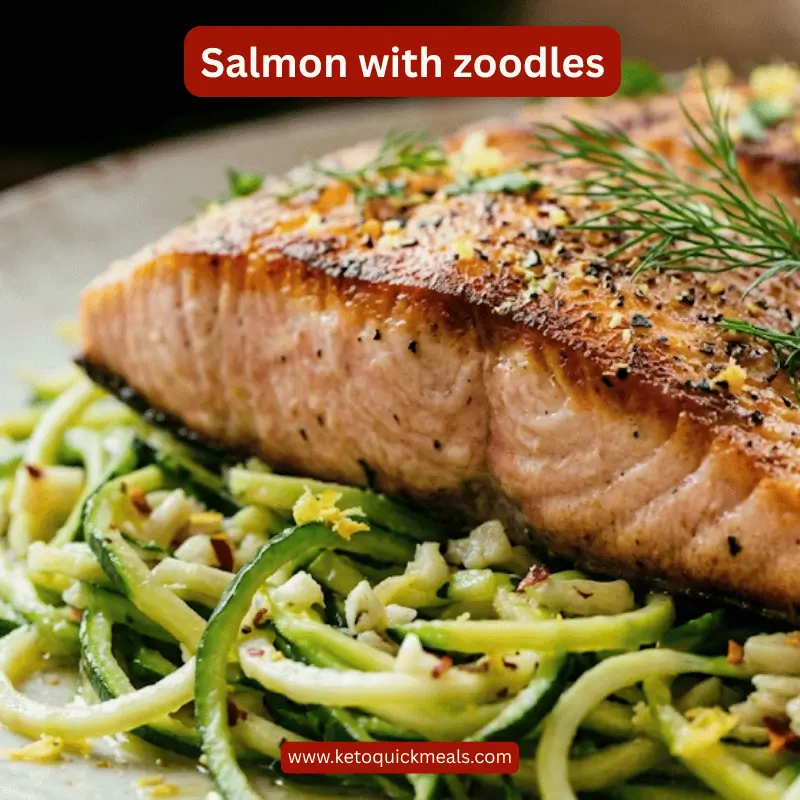
Serve hot. You can pair it with salad or zoodles if you like.
Baked Chicken Parmesan Recipe
Ingredients
Equipment
Method
- Preheat oven to 400°F (200°C).
- Pound chicken breasts to about ½-inch thickness for even cooking. Pat dry with paper towels.
- In one shallow bowl, whisk together eggs.
- In another bowl, combine almond flour, ½ cup Parmesan cheese, garlic powder, onion powder, Italian seasoning, paprika, salt, and pepper.
- Dip each chicken breast in the egg wash, letting excess drip off.
- Press into the almond flour-Parmesan mixture until evenly coated.
- Place coated chicken on a greased baking sheet or parchment-lined dish.
- Brush lightly with olive oil for extra crispiness.
- Bake for 20–22 minutes, flipping halfway, until golden and internal temp reaches 165°F (74°C).
- Remove chicken from oven. Spread marinara sauce evenly over each breast.
- Top with mozzarella cheese and the remaining Parmesan.
- Return to oven for 5–7 minutes, until cheese is melted and bubbly.
- For extra golden cheese, broil on high for 1–2 minutes.
- Garnish with fresh basil or parsley.
- Serve hot with zucchini noodles, cauliflower rice, or a side salad.
Notes
- For a spicy kick, add chili flakes or cayenne to the breading.
- Make it extra cheesy by adding provolone or gouda along with mozzarella.
- Use chicken tenders instead of breasts for a kid-friendly twist.
- Store leftovers in an airtight container in the fridge for up to 3 days, or freeze for up to 2 months. Reheat in the oven to keep crispy.
Nutrition Information (Per Serving)
- Calories: ~390
- Protein: 38g
- Fat: 22g
- Carbohydrates: 6g
- Net Carbs: 4g
- Fiber: 2g
Nutritional Info (Approx. Per Serving)
- Calories: 390
- Protein: 38g
- Fat: 22g
- Carbs: 6g
- Net Carbs: 4g
Common Mistakes to Avoid
One mistake I made early on was not flattening the chicken—it cooked unevenly and stayed thick in some parts. Another thing is adding sauce too early, which makes the coating soft. Also, don’t skip flipping the chicken while baking, or one side won’t crisp properly.
Kitchen Hacks (That Actually Help)
- Slightly chill the coated chicken for 10 minutes before baking—it helps the coating stick better
- Use a wire rack if you want extra crispiness
- Freshly grated cheese melts much better than pre-packed
- If your coating feels dry, just press it gently—it sticks well
Important Notes
- Don’t overbake the chicken or it may dry out
- You can adjust spices based on your taste
- Works well for leftovers too
- You can make it ahead and bake later
Frequently Asked Questions About Chicken Parmesan
1. Can I use chicken thighs instead of breasts?
Yes, you can definitely use chicken thighs. I’ve tried both, and honestly, thighs turn out a bit juicier and more flavorful. The only thing is they can take slightly longer to cook, so I just keep an eye on them. If I’m cooking for guests, I sometimes go with thighs for that extra tenderness.
2. What if I don’t have almond flour?
If I run out of almond flour, I usually don’t stress too much. I’ve used crushed nuts like almonds or even seeds, and they work fine. The texture changes a little, but it still gives a nice coating. Personally, I prefer almond flour because it’s more even and easy to work with, but alternatives can definitely save the day.
3. Can I skip eggs?
Eggs really help the coating stick properly, so I don’t usually skip them. But if I have to, I’ve tried using a bit of yogurt or cream, and it works okay. It’s not exactly the same, but it still holds the coating well enough. If you’re going egg-free, just make sure the coating is pressed on properly.
4. How do I keep the coating from falling off?
This used to happen to me a lot in the beginning. What helped me was making sure the chicken is completely dry before coating it. I also press the coating gently instead of just dipping it quickly. Sometimes I even let it sit for a few minutes before baking, and that makes a big difference.
5. Can I make this Chicken Parmesan in an air fryer?
Yes, and it actually works really well. I’ve made it in the air fryer when I didn’t want to turn on the oven. I cook it at around 180°C for about 12–15 minutes, then add the sauce and cheese and cook a bit more. It comes out nicely crisp, sometimes even better than the oven.
6. Can I use store-bought marinara?
Yes, I usually do because it saves time. I just try to pick one that isn’t too sweet. Some sauces can be a bit overpowering, so I prefer a simple one with balanced flavor. If I have time, I’ll adjust it with a little garlic or herbs.
7. How do I store leftovers?
I keep leftovers in an airtight container in the fridge, and they stay good for about 2–3 days. I’ve noticed it still tastes great the next day, especially if reheated properly. It’s actually one of those meals I don’t mind eating again.
8. What’s the best way to reheat Chicken Parmesan?
From my experience, the oven works best because it keeps the coating from getting too soft. I just heat it at a low temperature until warm. The microwave is quicker, but it does make the coating softer, so I only use it when I’m in a hurry.
9. Can I make Chicken Parmesan without cheese?
You can, but I’ll be honest—it won’t feel the same. The cheese really brings everything together and adds that classic flavor. I’ve tried it once without cheese, and it was okay, but not something I would repeat. So if possible, I’d keep the cheese.
10. Can I prepare it earlier and bake later?
Yes, and I actually do this sometimes when I want to save time later. I coat the chicken and keep it in the fridge, then bake it when needed. It makes things much easier, especially if you’re planning ahead for dinner.
This Baked Chicken Parmesan (Keto-Friendly) is honestly one of those recipes that feels simple but delivers every time. It’s crispy, cheesy, and easy enough for any day of the week.
I like recipes that don’t require too much thinking—and this is exactly that. Just a few steps, basic ingredients, and you’re done.
👉 If you enjoy simple, real-life recipes like this, you can check out more on my blog (www.ketoquickmeals.com) where I share easy meals, quick dinners, and low-carb ideas that actually work in daily life.
And now I’m curious…
How would you serve this? With salad, zoodles, or just on its own?
Let me know in the comments—I always enjoy seeing different ideas 😊

Hi! I’m Somz Fazy, a passionate food blogger who loves sharing simple and healthy recipes. At ketoquickmeals.com, I post easy low-carb, high protein, mediterranean recipes, air fryer recipes and helpful tips based on my personal experience and lifestyle.
DisclaimerThe content on this website is for informational purposes only and based on personal experience. It is not medical advice. Please consult a healthcare professional before making any dietary changes.